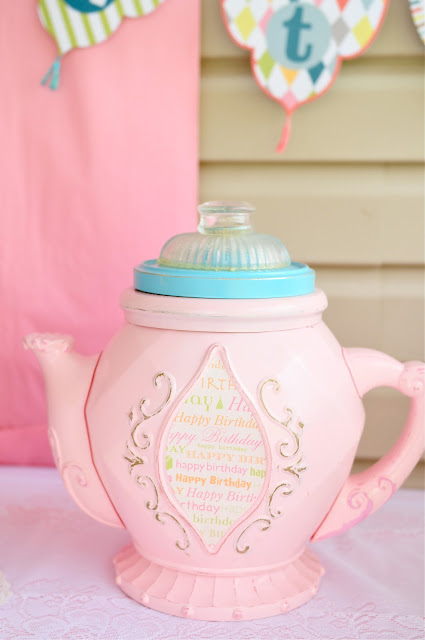
As promised, here is the tutorial for the large teapot seen at my daughter's 7th birthday party!
I bought one of these ugly plastic teapots (used to hold disney princess tea cups and plates, etc...) It was $1 at DI, it had no lid so I bought one at DI for 50 cents that fit on top! You could stop there with the lid.....but I couldn't! Next I spray painted my teapot pink, took the knob off the lid, and sprayed it as well. I had the ceiling pieces to the chandelier sitting in my garage, so I of course had to paint the gold metal part aqua, hooked it onto the pink lid with a bolt, gorilla glued the crystal dome on, and I had a percolator top for teapots that I bought at Smith and Edwards for a couple bucks that I gorilla glued to the dome! (I think it would be just as cute, and much easier to just to the pink part of the lid, and srew a hobby lobby crystal knob on in place of the one that came on it) ;) I also sanded all the raised area and edges, cut a paper to fit the opening, sprayed the back of the paper with spray adhesive, and stuck it on!
There you have it! A large teapot for under $5!


This is a really dumb question but I am a beginner DIYer and was wondering if you could do a post on how to properly sand things as well as distress them? Do you use an electric sander? All of my DIY furniture projects have turned out looking really homemade and I think it's because I'm not sanding correctly.
ReplyDeleteThanks!
Hey Liz! Yes, we would be happy to do a post on distressing! We just distress by hand, we have never used an electric sander to distress!
DeleteA beautifully crafted teapot grinding-guide
ReplyDelete